


In today’s post, I’ll be talking about how to authenticate users with sessions.
On top of express-session and passport.
So before firing up, I’m hoping you all know how to set up a basic app in Express with help of middleware. If not, go and search Google for advice on how to get started with that. I’d also recommend going through Passport Documentation if you haven’t used it before.
Once you’ve set up a basic app using express, the next thing we need is express-session and Passport middleware.
If you want to explore more about how express-session works. I’ll post the articles & links which can help you with that.
So assuming your app.js should look something like this, after configuring express-session alongside Passport.
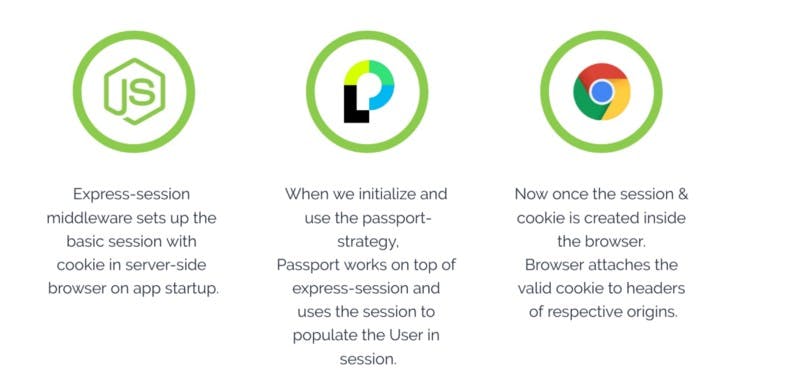
Now, one thing to note here is that Passport works on top of the express session. So you have to use the express session middleware before using Passport middleware.
Once you’ve set up the middleware, your passport strategy will come into the picture, which will be looking like this.
In this example, I’m using Google Strategy. For this you have to create an app in the google developer console, to generate these credentials.
Express-session
The express-session middleware comes with a default option to store sessions in memory.
Now since the session is stored server-side, the express-session middleware comes with its own implementation, which stores the session in memory that is local to the server-side application, so it’s not going to be a scalable solution.
So we can use the session-store implementation to store our actual session in the database.
When we used the express-session middleware, what it did is it basically create a session in the browser with a cookie.
Now our session is stored in the database, thanks to express-session.
The Workflow
Once we have set up all the middleware successfully, the next thing we will need is an endpoint that will get called when we try to login with google.

So, when we will click on this button eventually, this endpoint will get called.
Now when we call passport.authenticate(‘google’) middleware in our route, what happens is the passport strategy which is provided — in our case ‘google’ — gets executed.
The next thing that happens is we get the user information if our creds are correct with the provided google account.
Now once the strategy is successfully executed control moves on to passport.serializeUser().
This method is basically a lifecycle method, which gets invoked when we execute the strategy.
In serializeUser() we can determine which data of the user object should be stored in the session. The result of the serializeUser method is attached to the session as req.session.passport.user = {}
To sum it up, passport.serializeUser() saves the user inside the session which was earlier created by express-session middleware.
Once the user is saved inside the session, the session itself also will get stored inside the database (only if we opt to).
Passport uses serializeUser function to persist user data (after successful authentication) into session. The function deserializeUser is used to retrieve user data from session and perform some condition-based operations.
Now all the endpoints hitting the backend server will go through passport.deserializeUser().
So, let’s say if you are trying to hit the protected routes in backend, then in deserializeUser() you can check if the user is authenticated or not.
Now until the session is valid the browser will attach the cookies as header in all requests from that origin.
Almost there
One more thing to destroy the session, all we have to do is call the methodreq.logout() and req.session.destroy()
That’s it! Thanks for sticking with this. I hope you have found it useful. If so, be sure to share on socials and leave plenty of comments!
Build composable web applications
Don’t build web monoliths. Use Bit to create and compose decoupled software components — in your favorite frameworks like React or Node. Build scalable frontends and backends with a powerful and enjoyable dev experience.
Bring your team to Bit Cloud to host and collaborate on components together, and greatly speed up, scale, and standardize development as a team. Start with composable frontends like a Design System or Micro Frontends, or explore the composable backend. Give it a try →

Learn More
[How We Build Micro Frontends
Building micro-frontends to speed up and scale our web development process.blog.bitsrc.io](https://blog.bitsrc.io/how-we-build-micro-front-ends-d3eeeac0acfc "blog.bitsrc.io/how-we-build-micro-front-end..")
[How we Build a Component Design System
Building a design system with components to standardize and scale our UI development process.blog.bitsrc.io](https://blog.bitsrc.io/how-we-build-our-design-system-15713a1f1833 "blog.bitsrc.io/how-we-build-our-design-syst..")
[The Composable Enterprise: A Guide
To deliver in 2022, the modern enterprise must become composable.blog.bitsrc.io](https://blog.bitsrc.io/the-composable-enterprise-a-guide-609443ae1282 "blog.bitsrc.io/the-composable-enterprise-a-..")
[7 Tools for Faster Frontend Development in 2022
Tools you should know to build modern Frontend applications faster, and have more fun.blog.bitsrc.io](https://blog.bitsrc.io/7-tools-for-faster-frontend-development-in-2022-43b6f663c607 "blog.bitsrc.io/7-tools-for-faster-frontend-..")